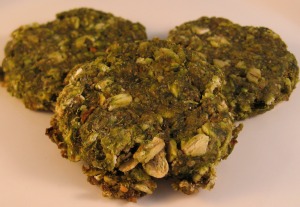
Crunchy Chicken Flavored Dog Treats

Ingredients:

1 lb. ground turkey or chicken

1 Lg. egg

1/4 tsp. of garlic powder (not garlic salt)

1 Lg. sweet potato, cooked and mashed

5 Tbsp. rolled oats (large flaked) quick or regular will do fine


Directions:

Pre-heat your oven to 350 degrees.

Lightly grease a cookie sheet with olive oil or non stick cooking spray.

1. Combine all the ingredients in a large bowl and mix thoroughly with a spoon or go ahead use your hands, they are a much better mixer anyway.

2. Once completely mixed, scoop all ingredients onto the cookie sheet and spread evenly to the sides of the pan.

3. Flatten the mixture out to around 1/4″ to 1/2″ thick. If you find that the mixture is sticking while you’re flattening it, lightly wet your hands and pat down the mixture.

4. Bake your crunchy chicken flavored dog treats for one hour at 350 degrees.

5. Remove the pan from the oven and use either a cookie cutter or pizza cutter to cut out shapes or into squares, making sure the size is appropriate for your dog breed.

6. Place the cut dough back into the oven for about one more hour at 250 degrees.

Cooking times vary depending on your oven so make sure to check the dog treats. They should be crunchy and a bit crispy but not burnt.

Storing

Because these crunchy Chicken Flavored Dog Treats have meat in them I wouldn’t keep the dog treats in a dog biscuit jar.

It’s much better if you store them in the refrigerator for up to 1 week. You can also freeze the uncooked, cut out dough for up to 4 months. Take out from the freezer, pop them in the oven and cook.


Thanks to http://www.love-my-puppy-dog.com/chicken-flavored-dog-treats.html for the recipe

Homemade Dog Cookies – with Heart Healthy Spinach

Spinach is the vegetable of choice for these heart healthy cookies. Did you know that spinach is extremely rich in antioxidants, a rich source of omega-3 fatty acids and contains over 20 other vitamins and minerals? Wow, with a veggie this healthy, we should all include this gem in our diets!

The carrots in this recipe add vitamins and a natural sweetness that most dogs love. The rolled oats also contain omega-3 fatty acids, and don’t forget the healthy fat added by the extra virgin olive oil. We know what you’re thinking, with such a heart healthy treat, we’ll look the other way while you try a nibble.

homemade dog cookies

Ingredients:

  • 1 cup whole wheat flour
  • 1 cup rolled oats
  • 1/8 cup Parmesan cheese
  • 1 2/3 cup frozen spinach
  • 1 cup grated carrot
  • 1/8 cup chicken broth, low sodium
  • 1 tbsp extra virgin olive oil


Instructions:

  1. Preheat oven to 350° F
  2. Whisk together the flour, oats and cheese.
  3. Place the spinach in a microwave safe bowl. Add 1 tablespoon of water. cover and cook for 2 minutes, or until heated through. Stir and drain any excess water.
  4. In a blender, puree the lightly cooked spinach, carrots and chicken broth.
  5. Thoroughly scrape the pureed mixture out of the blender into the dry ingredients.
  6. Add the extra virgin olive oil.
  7. With a fork, break apart and stir together the spinach and flour mixtures.
  8. Spray a baking sheet with non-stick cooking spray.
  9. Using a tablespoon sized cookie scooper, place spinach balls on the prepared sheet.
  10. Dip the bottom of a drinking glass (or something similar) in water. Next, gently press one spinach ball into a flattened cookie shape. Repeat process with each rounded ball.
  11. Bake for 20 minutes.
  12. Cool completely on a wire rack before serving.


Storing – These homemade dog cookies will keep fresh in the refrigerator for up to two weeks. Keep them for up to 6 months in your freezer.

Yield – Using a tablespoon sized cookie scooper, this recipe will make 24 dog cookies.

Tips & Techniques


  • Vegetarian & Vegan Dog Treat – Make this dog cookie recipe a true vegetarian treat by substituting the chicken broth with water. To make it a vegandog treat, you will also want to substitute the Parmesan cheese with soy or almond cheese.
  • Blender or Food Processor? – Personally, my blender works much better at pureeing foods, so that is what this recipe calls for. If you find that your food processor works better, then by all means, use the kitchen appliance that works best. The idea is to achieve a thick liquid consistency to blend well with the dry ingredients.
  • Parmesan Cheese – To help make this an easy dog treat recipe, we used powdered Parmesan cheese. However, you can use pre-grated or freshly grated Parmesan, too. If you grate the cheese yourself, be sure that the pieces will fold well into the treat without sticking out, as they will most likely burn in the oven.
  • Fork or Spoon? – It may sound a little strange to stir the wet and dry ingredients together with a fork, but that’s what’s needed. The spinach mixture has a desire to clump together, but by using a fork you can break apart the little mounds of spinach.
  • Microwave Your Spinach – Research suggests that microwaving spinach is a better option than boiling. The reasoning is that by boiling the spinach you can decrease the amount of folate by up to half. Since these homemade dog cookiesare all about their nutritional value, lets keep the vitamins in the cookie and in our dog’s tummies.

Thank you http://www.dogtreatkitchen.com/homemade-dog-cookies.html for the recipe.

Keeping Your Three-Legged Dog Healthy

• Protect remaining limbs
• Put a sock/pad on the “elbow” of the remaining leg (to prevent calluses and pressure sores)
• Keep the dog’s weight down
• Take care of the dog’s skin and pads
• Exercise the dog regularly (walking is good; swimming is best)
• Assist or monitor the dog on stairs
• Monitor the dog’s activity level and don’t let him or her overdo it
• Give glucosamine, fish oils and other anti-inflammatory supplements
• Maintain a good diet and good overall health
• For front leg amputations, use a car seat harness with wide chest bands
• Invest in a “wheelchair,” if necessary, to help with mobility

From The Bark, Dog is my copilot

Dehydrated Sweet Potato Dog Treats

I’ve been making dehydrated sweet potato dog treats for my pooches for a long time.

With there being so many issues with store bought dog treats containing unhealthy levels of antibiotics or salmonella poisoning, I would seriously encourage you to begin making your own dog treats.

Then you know what your dog is eating for sure!

AND Sweet Potatoes are an excellence source of c, b-complex, iron, and phosphorus, which all are great for your dogs immune system along with other benefits.


Ingredients

3 Large Sweet Potatoes Uniform in size, washed and dried


Instructions

Quick Trick for easy slicing:  Put the washed sweet potato in the microwave for a couple of minutes to soften it just a bit. This will make it easier to slice. Otherwise trying to cut that darn hard potato could result in slicing other things like your fingers or hands. Really I’m serious! They are stinking hard! AND roll!

  • Preheat your oven to 250 degrees F
  • Line your baking sheet with parchment paper
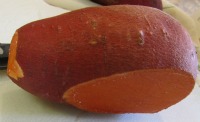
  • Take the precooked Sweet Potato lay it down lengthwise on a cutting board and cut off one side close to the edge of the fattest part. This will create a flat stable surface and make cutting easier so it won’t roll all over the place.
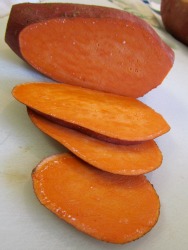
  • Lay the potato on this flat cut side and begin cutting at one end of the potato. Cut each slice 1/4″ thick. Your not cutting lengthwise, your cutting from end to end.
  • I submerge the slices in cold water for about 1-2 minutes just to blanch them a bit to help keep their color. Remove with a slotted spoon to cooking sheet.
  • Place the sweet potato slices on your baking sheet.
  • I bake for about 3 hrs., turning the slices 1/2 way thru. This will give you a soft, but chewy dog treat. For a crunchier treat, cook an additional 20-30 minutes depending on how hot your oven cooks. Just check them around 20 minutes.
  • Remove from the oven and place on a wire rack to cool. Your sweet potato dog treats me seem a little chewy when you first take them out. Let them cool to see if you like the texture. If not put them back in the oven until desired texture.


Voila’ Your Finished Dehydrated Sweet Potato Dog Treats

Using a Dehydrator

Prepare your sweet potatoes the same as above and load into a dehydrator, leaving space in between slices to make cooking even.  Set your machine as directed in your book.

I typically dehydrate my sweet potato dog treats approximately 10-12 hours. I like to have them a bit soft when done because they will harden once cooled and refrigerated. You may need to test a batch or two until you get the texture where you and your puppy dog like them.

Let slices cool on dehydrator racks and then place into a zip lock and keep in the refrigerator up to 2 weeks.

With either cooking methods, the color that your dehydrated sweet potato dog treats turn out will vary. The cold blanching always keep ours a nice color.

Don’t worry if they don’t look like the picture on this page. Your dogs won’t care, they just wanna eat those Sweet Potato Dog Treats!


Thank you to http://www.love-my-puppy-dog.com/dehydrated_sweet_potato_dog_treats.html for the recipe

Grain Free Pumpkin Dog Treats

This grain free dog treat recipe is jammed packed with protein, antioxidants, minerals and fiber which all come from the Buckwheat. The Flax seeds are an excellent source of plant-based essential omega-3 fatty acids.

You can find these ingredients at your local store and health food stores. Also you can find them in the “organic” section of your stores.

Note: Buckwheat and Flax Seed are actually seeds and often confused as a grain.

Grain Free Pumpkin Dog Treats

Ingredients:

  • 2 cups buckwheat flour
  • 2 large eggs
  • 1/2 cup ground flax seeds (flax meal)
  • 1 cup canned pumpkin puree
  • 1/4 cup of chicken or beef stock

Preheat oven to 350 degrees

Line 2 baking sheets with parchment paper

Directions:

In a large mixing bowl put the buckwheat flour and ground flax seeds. Add the pumpkin puree, eggs, and chicken or beef stock to mixture.  Using an electric mixer, beat all on high until the mixture is smooth – the mixture will be very thick.

Large Dog Size:

Using an tablespoon, drop rounded mounds of mixture on baking sheet. Use a fork to press down on the top of the mounds, kinda like how you would do for a peanut butter cookie, until they are around 1/4″ thick.  Dip your fork in water frequently to prevent from sticking.

Small Dog Size:  Use a teaspoon to drop onto the baking sheet, continuing with the fork to press down.

Bake for 20 minutes. Remove from the oven and turn the dog treats over and return to oven to cook for another 20 minutes. The cookies should feel hard to the touch when done. Cool completely on a cooling rack.

Note:  Your small dog Size will take less time to cook, so keep a watch on them. Every oven cooks differently, but I usually cook them for 10 minutes on each side.

Once completely cool, store the grain free dog treats in an air tight container.

Don’t think you need to make the entire batch of this grain free dog treat recipe?  No problem, divide the dough in half, put half of the dough on saran, flatten it out, then wrap tightly in saran and place in a freezer bag. When your ready, thaw and cook as above. Why flatten the dough?  I do this to everything (human and dog) doughs, sauces etc. because it defrosts much faster than if left in a big ol ball.


Thank you to http://www.love-my-puppy-dog.com/grain-free-dog-treat-recipe.html  for the recipe

One month since surgery

Bo is just about to reach his 30 day anniversary from when he had his surgery. We made it through the holidays! I was even able to travel with him by car to spend Christmas with the family.  It has been an effort each day to keep my emotions together and be strong for him. Initially he slept alot and stumbled often. Runners were put in places throughout the apartment for traction and I modified his diet to a high protein low carb diet. I had a soft cone at the house but never applied it. He seems uncomfortable enough to have to deal with navigating with a cone around his neck!

I also started  cataloging recipes I find on the internet and will be posting on this blog. Whatever new creations I come up with that he has given his lick of approval will be shared with you!

Overall, he is doing well. I was able to stay home and care for him for the last 2 weeks of December which has made it easy to notice all his little milestones: like when he walked to the street corner (eventually we improved to around the block and recently made it to the park, check!!!! Another milestone was when he walked over to his treat cabinet to ask for a snack, check! Or the moment he wanted to get back on the couch and snuggle with me, check! His first full teeth smile when I came back from running to the store (PRICELESS).

He can now run and seems more coordinated when changing directions. When on grass at the park, he drops down onto his back a wiggles back and forth. Its so amazing to see those paws up in the air and watch him let loose, happy doing things he used to do that made him feel good.

Also wanted to mention that in preparation to receive him at home after surgery I bought several items that I have found invaluable. The first is a coat. I researched many brands but this coat from Ruffwear (http://www.ruffwear.com/Cloud-Chaser-Soft-Shell-Dog-Jacket?sc=2&category=42917) was exactly what I was looking for. The top part has a protective shell (good if you live in polar vortex states like we do). The bottom is a kind of under armor material that also lines the inside. Bo lost his front right leg so all I have to do is slip is other leg in and there is a zipper that zips along the entire length of his body. Easy to get on and off. This coat has protected him from the rain, snow, wind..cannot say enough good things about it. The next item I got Bo was a soft crate. Like with the coat there were many kinds to choose from. (http://bit.ly/1ae57Q3) I needed something large enough for my beast and it had to fold down and be portable. Bo has never been crated so I was worried if he would take to it. Well that concern was quickly dismissed because as soon as I  brought it home and popped it open, in he went. Hist first few weeks post surgery were mostly spent napping in his crate. I could go out or shower in peace knowing he was not in danger of falling in the apartment and injuring himself. Finally, I bought Mushers (http://musherssecret.net/). Its a natural safe wax made from a blend of several food-grade waxes. A friend had told me about it once but had not tried it until now. In the evenings, as he rested, I would sit with him no the carpet by the Christmas tree lights an massage his pads with Mushers. The next morning, after just one treatment, his pads felt like those of a newborn puppy. He did not have overly cracked or dry pads but they were rough. Its great for his feet and he loves the extra special rub down he gets.